Some projects are all about function—and some are about bringing people together. This handcrafted beverage caddy does both. Designed to make carrying drinks easy and gatherings feel a little more special, this piece blends rustic wood tones with cheerful pops of color and thoughtful details. What a great way to gift beverages – from rootbeer to artisan drinks.
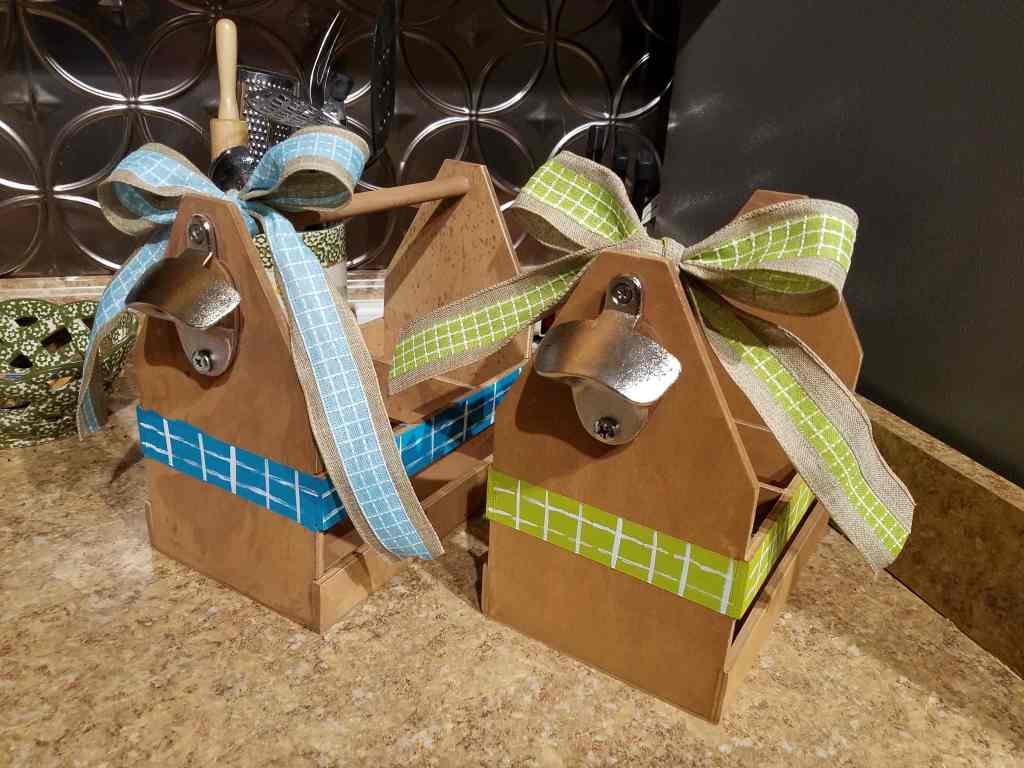
I didn’t build these carriers from scratch. I found them for one dollar each at an after-Christmas clearance, which made them the perfect item to buy once and leverage all year long. Keep an eye out for them at yard sales too. Whether it’s set out for a backyard get-together, gifted to a host, or filled for a weekend celebration, this beverage caddy adds charm and convenience in equal measure.
The real effort went into finishing them with paint and coordinating ribbon accents. The result is a practical piece that still feels creative, thoughtful, and ready to be enjoyed—and it comes together so easily.
I also struggle when it comes to gifting crafty items to the men in my life, and this project is always a winner. It’s useful, not fussy, and feels just as appropriate for casual gatherings as it does for gifting. Another bonus? These carriers are easy to restyle, easy to regift, and create little to no waste—making them a feel-good project all around.
📢 Affiliate Disclosure
As an Amazon Associate, I earn from qualifying purchases. This means that if you click on a link and make a purchase, I may earn a small commission at no extra cost to you. This helps support this site and allows me to continue sharing creative tutorials and inspiration. 💛
Supplies Used in This Project
(These are the supplies I personally use and recommend.)
- Unfinished wooden (or even cardboard) beverage carrier
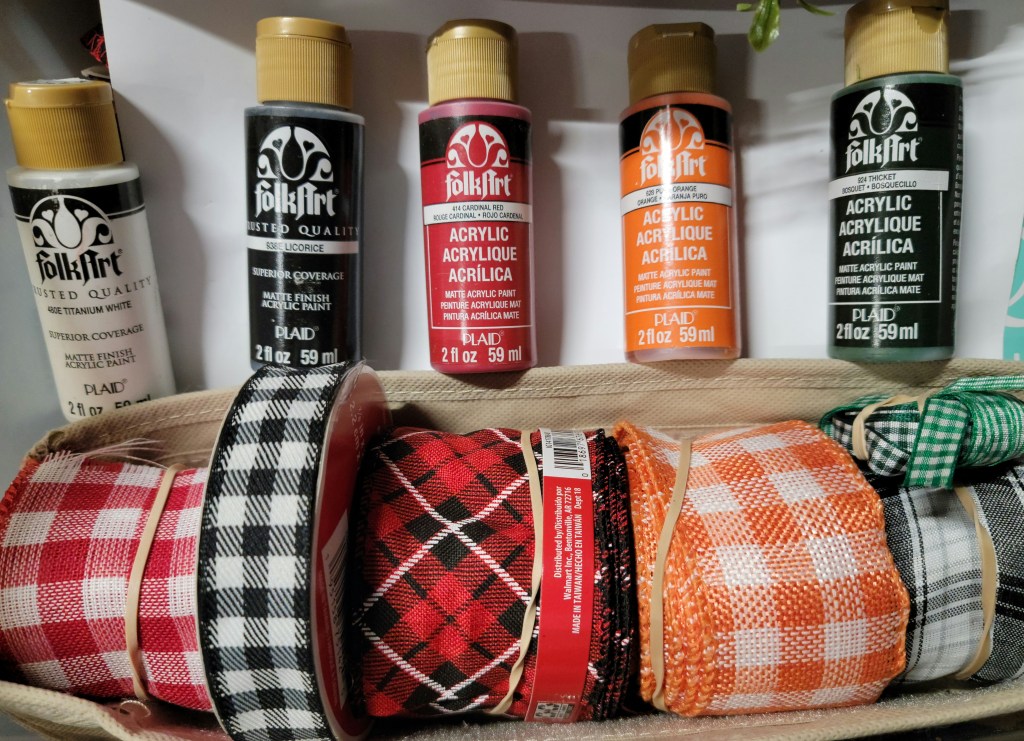
- Decorative ribbon (simple patterns work best)
- Acrylic craft paint (to coordinate with your ribbon)
- One flat paintbrush (similar width to your ribbon pattern)
- Painter’s tape
- Scissors
- Paper towel or scrap paper (for testing paint)
- Clear sealer or protective finish (optional)
How to Make a Simple Painted Beverage Carrier
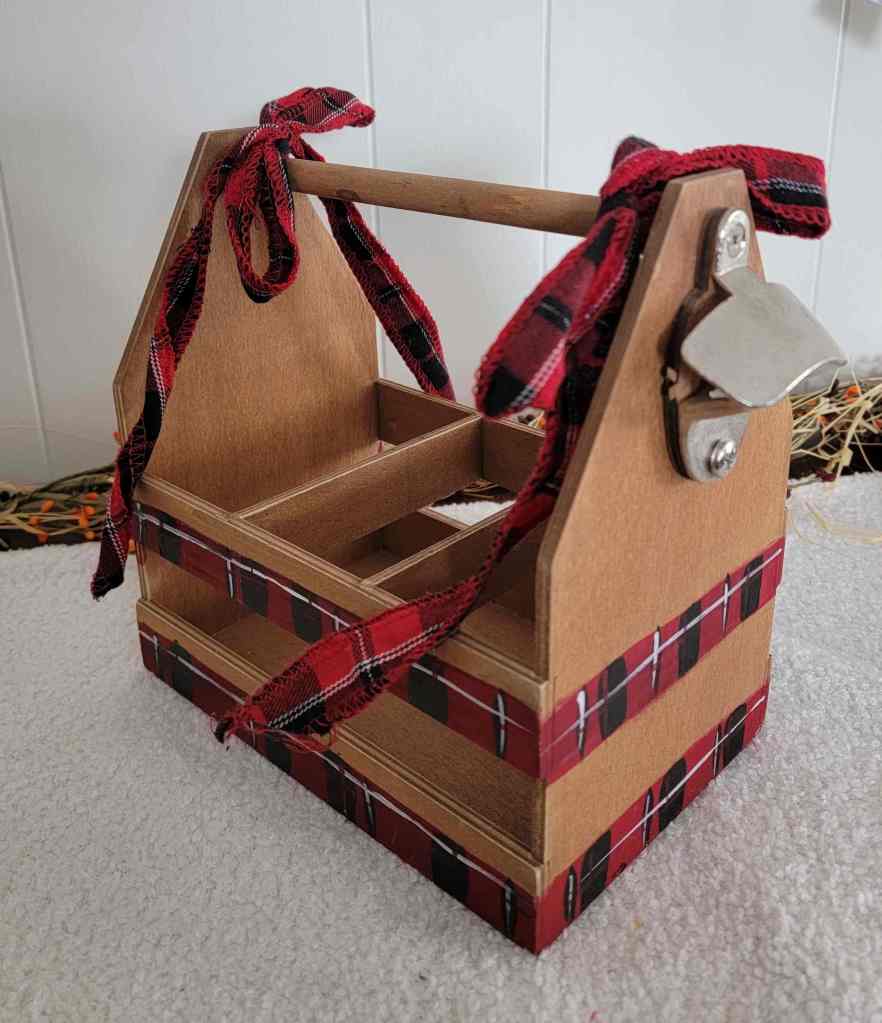
Choose your ribbon first
Start with simple ribbon patterns that match the season or occasion—think spring florals, summer checks, fall plaids, or holiday colors. The ribbon becomes your design guide.
Match your paint to ribbons
Pick a coordinating paint color and use one flat brush that closely matches the width of your ribbon pattern. Keeping it simple helps the design stay crisp and intentional.
Paint to mirror the ribbon
Lightly tape off the area on the carrier where the ribbon will sit. Using the ribbon as your reference, duplicate the pattern with paint—straight lines, checks, or bands work beautifully.
Add the finishing touches
Once the paint is dry, tie the ribbon onto the carrier for a layered, handcrafted look.
Fill and enjoy
Load the carrier with your favorite beverages and it’s ready for gifting, gathering, or a weekend treat.
What You May Already Have at Home
Before heading to the craft store, take a quick look around—you may already have most of what you need:
- Leftover acrylic paint from past projects
- A flat paintbrush (perfection isn’t required)
- Painter’s tape or masking tape
- Scissors
- Ribbon scraps from gifts, wreaths, or seasonal décor
- Paper towels or scrap cardboard for paint testing
This project is very forgiving, making it perfect for using up supplies you already own and turning them into something both useful and gift-worthy.
Why This Is a Great Beginner Project
This beverage carrier is ideal for beginners because it focuses on simple techniques with big impact. There’s no complicated measuring, no advanced tools, and no pressure for perfection. Straight lines, basic brush strokes, and easy patterns are all part of the charm.
Using ribbon as your design guide removes the guesswork, making it easier to create something that looks polished and intentional. If a line isn’t perfectly straight, it only adds to the handmade feel.
Paint dries quickly, mistakes can be touched up, and the finished piece is both functional and gift-ready—making this a confidence-boosting project for any skill level.
Beginner Pattern Examples
- Simple stripes → easy to tape and paint with straight lines
- Gingham / check → forgiving pattern that looks charming even if imperfect
- Solid ribbon with a thin border → minimal effort, very polished result
These styles translate especially well to wood surfaces and are perfect for duplicating with one flat brush and painter’s tape.
Seasonal Ribbon Ideas
🌸 Spring
- Soft pastels (mint, blush, butter yellow)
- Thin stripes or gentle florals
- Light, airy patterns that feel fresh and clean
☀️ Summer
- Classic red/white or blue/white stripes
- Gingham or nautical-inspired lines
- Bright but simple—perfect for outdoor gatherings
🍂 Fall
- Plaids with wide, easy-to-copy lines
- Warm tones like rust, mustard, and cream
- Rustic patterns that look great slightly imperfect
❄️ Winter / Holiday
- Bold holiday stripes (red/green, black/white)
- Simple plaids for a cozy look
- High-contrast patterns that translate beautifully to paint
Why I Love This Project
What I love most about this project is how approachable it feels from start to finish. You don’t need perfect lines, fancy tools, or years of experience—just a willingness to try. Each finished carrier is a reminder that creativity grows through simple steps and small wins. Whether this is your first painted project or one of many, it’s the kind of make that builds confidence, encourages experimentation, and leaves you with something you’ll genuinely use or be proud to gift.
🛒 Shop the Supplies Used in This Project
(Affiliate links below)
- Unfinished wooden beverage carrier
- Decorative ribbon (simple patterns work best)
- Acrylic craft paint (to coordinate with your ribbon)
- One flat paintbrush (similar width to your ribbon pattern)
- Painter’s tape
- Scissors
- Paper towel or scrap paper (for testing paint)
- Clear sealer or protective finish (optional)
Read Privacy Policy for details


Leave a comment