Custom sublimation pens are one of those projects that feel extra impressive for how simple they actually are. They’re perfect for gifts, small businesses, party favors, or just proving to yourself that you absolutely can do this.
If you’ve got a sublimation printer and a heat source, you’re already halfway there.
📢 Affiliate Disclosure
As an Amazon Associate, I earn from qualifying purchases. This means that if you click on a link and make a purchase, I may earn a small commission at no extra cost to you. This helps support this site and allows me to continue sharing creative tutorials and inspiration. 💛
What You’ll Need
Before we start, here’s your supply list:
- Sublimation pens (coated for sublimation)
- Sublimation printer & sublimation ink
- Sublimation paper
- Heat source
- Mug press, convection oven, or heat press with attachment
- Heat-resistant tape
- Shrink wrap sleeves (recommended for even pressure)
- Optional: Pen template holder
- Heat gun (for shrink wrap)
- Protective gloves (trust me on this)
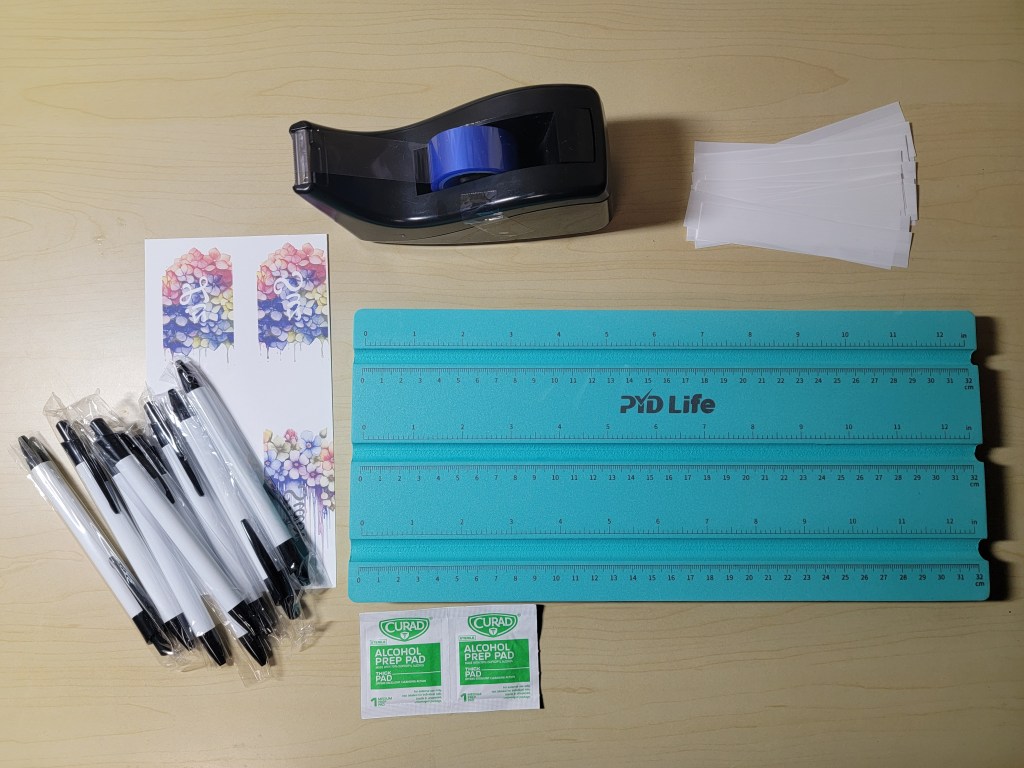
✨ Optional but helpful: lint roller, butcher paper, and a timer.
Step 1: Design Your Wrap
Create or purchase a pen-sized design. Most sublimation pens use a wrap template, so make sure your design fits the printable area.
- Mirror your design before printing
- Use high-quality settings on your printer
- Let the ink dry completely before handling
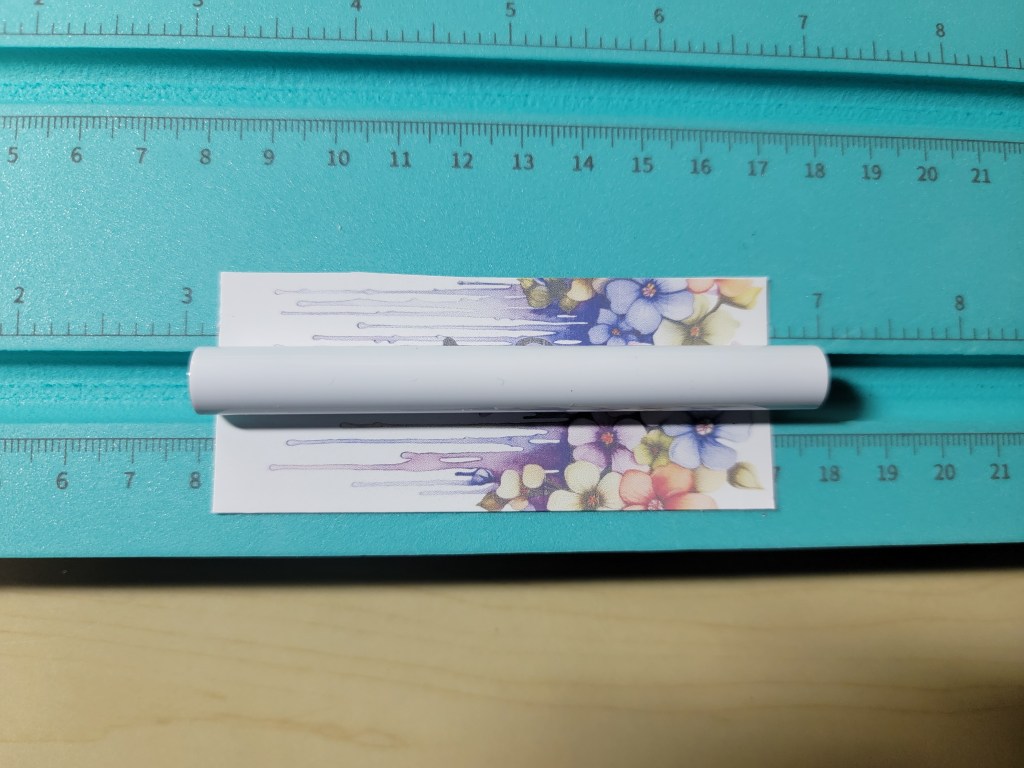
Step 2: Prep the Pen
Clean the pen barrel to remove oils or dust (a lint-free cloth works great).
Wrap the printed design tightly around the pen with the ink facing inward and secure it with heat-resistant tape.
Step 3: Shrink Wrap Time (Don’t Skip This)
Slide the wrapped pen into a shrink wrap sleeve.
Use a heat gun to shrink it evenly around the pen—rotate slowly so it tightens smoothly without wrinkles.
This step is key for crisp, professional results.
Step 4: Heat It Up
Place your pen into your heat source:
General Guidelines (always check your blanks):
- Temperature: ~375–400°F
- Time: 4–6 minutes
- Rotation: Rotate halfway through if needed
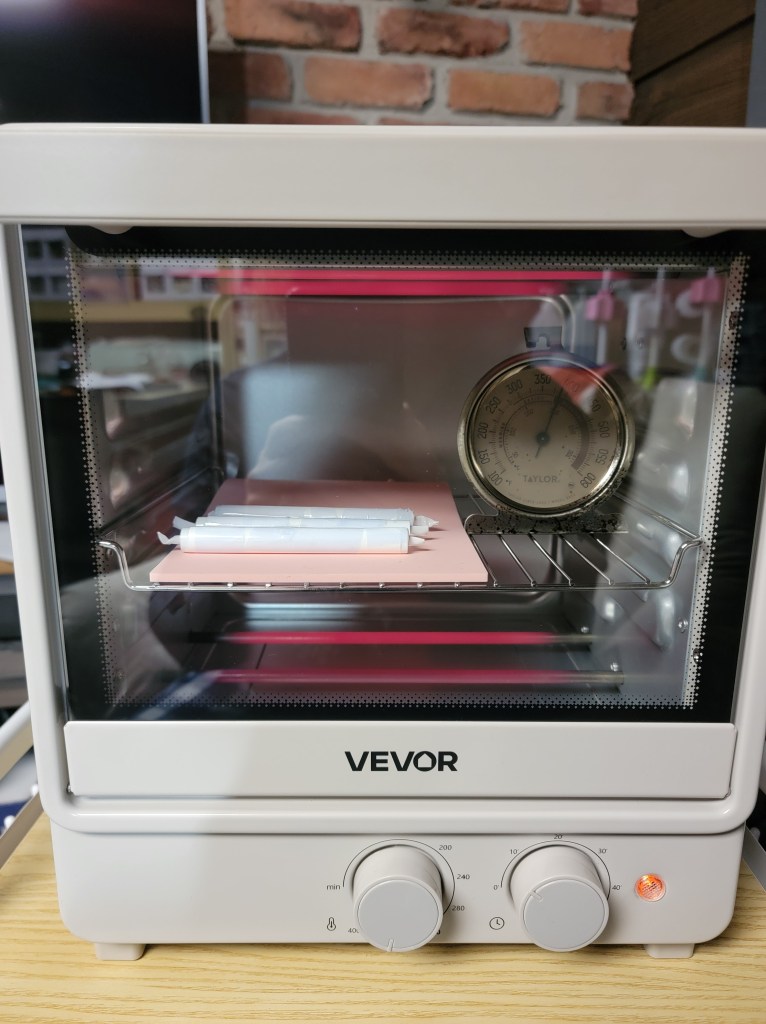
Use butcher paper underneath to protect your equipment from ink bleed.
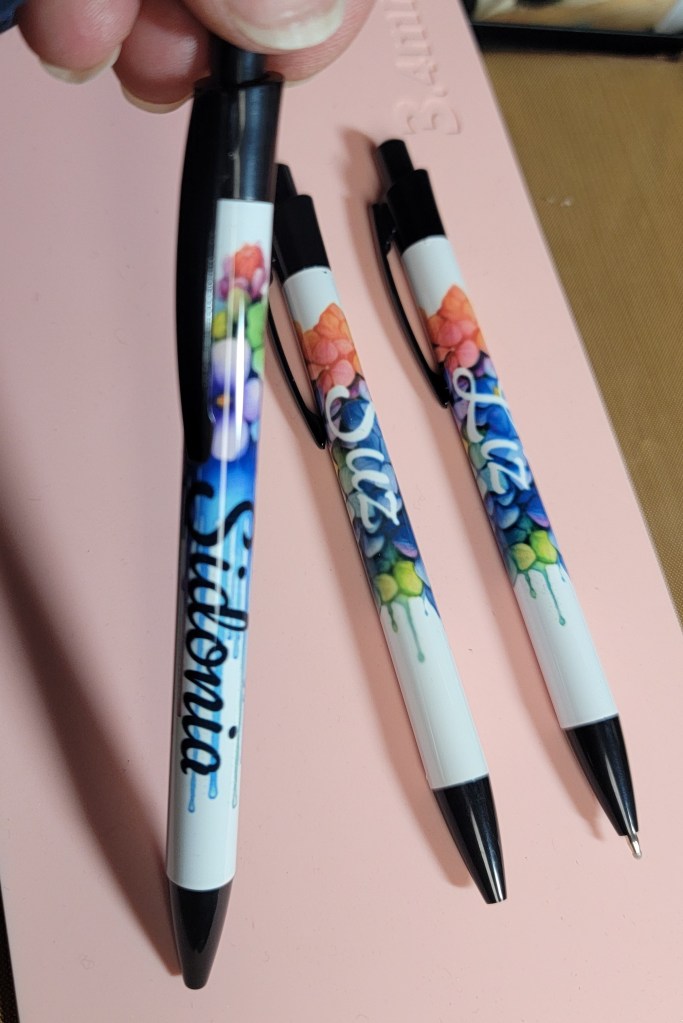
Step 5: Cool, Reveal, Admire
Carefully remove the pen using heat-safe gloves.
Let it cool slightly, then peel off the shrink wrap and paper to reveal your design.
That reveal moment? Chef’s kiss. 😍
Common Mistakes (and How to Avoid Them)
Ghosting: Don’t move the wrap once heated
Faded design: Increase time or temp slightly
Blurry edges: Wrap tighter + use shrink wrap
Uneven transfer: Rotate during heating
Why Sublimation Pens Are Worth Making
- Budget-friendly blanks
- Fast projects with big payoff
- Perfect add-ons for gift sets
- Great seller for craft fairs and shops
They’re small, but they feel high-end—and that’s the sweet spot.
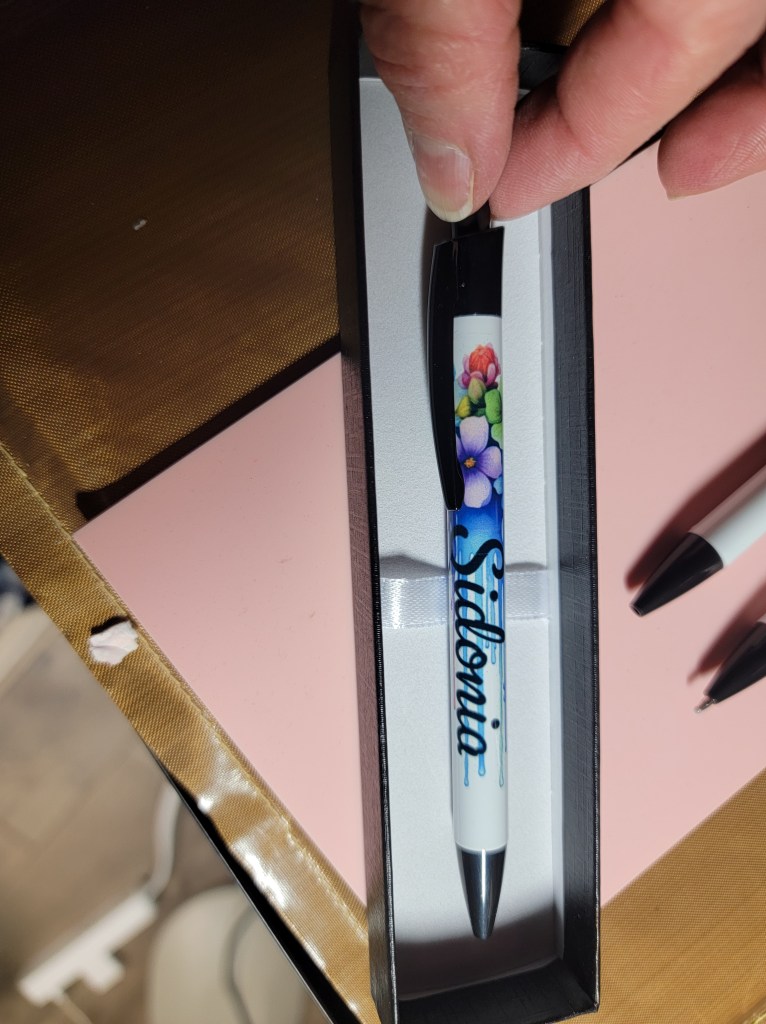
Final Thoughts
I love to elevate pen gifting by putting it in an impressive box.
I’d love to see how your project turns out—feel free to share your results!
🛒 Supplies I Used + Where to Find Them
Shop the exact supplies used in this project
If you’d like to recreate this project exactly as shown—or stock up on reliable tools—these are the products I personally used and recommend. I’ve linked them below for easy shopping.
- Sublimation pens (coated for sublimation)
- Sublimation printer & sublimation ink
- Sublimation paper
- Heat source
- Mug press, convection oven, or heat press with attachment
- Heat-resistant tape
- Shrink wrap sleeves (recommended for even pressure)
- Heat gun (for shrink wrap)
- Protective gloves (trust me on this)
- Optional: Pen template holder
- Gift wrap : Pen Boxes
These links may be affiliate links, which means I may earn a small commission at no extra cost to you. I only share products I actually use or truly recommend.
Read Privacy Policy for details


Leave a comment