A snow globe tumbler is a double-walled tumbler filled with liquid and floating glitter or shapes that move when you shake or tilt it—just like a snow globe. They are glorious because is there anything better than glitter you can take with you?
This is beginner-friendly and easier than it looks — especially if you start with a pre-drilled tumbler.
- Great for any occasion, a gift that is only a few dollars to make with a huge impact
- Shapes (in place of glitter) adds interest and fun
- Different fluids can change the dance of the glitter
- This project is one of my favorite ways to use glitter. Glitter is happy and wonderful and cheap – and so if it requires glitter it needs to be made! You can use as much or as little as you like.
📢 Affiliate Disclosure
Some of the links below are affiliate links, which means I may earn a small commission if you choose to purchase — at no extra cost to you. As a Walmart Creator, I link to supplies I actually use and love. 💛
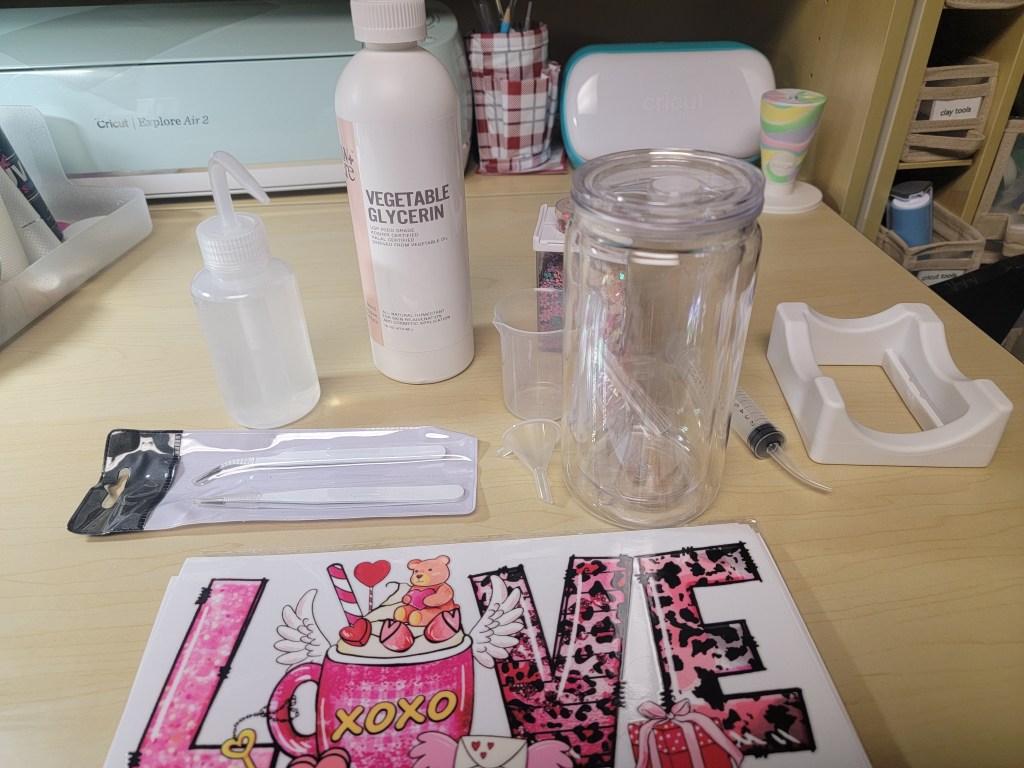
Supplies Used in This Project
(These are the supplies I personally use and recommend.) To make this easy, I’ve linked the exact supplies I use below.
- Double-wall clear tumbler (pre-drilled)
- Glitter, mica powder, sequins, or shapes
- Distilled water
- Vegetable glycerin or clear glue (for slow-float effect)
- UV resin or epoxy (for sealing)
- UV light (if using UV resin)
- Plastic syringe or pipette
- Vinyl decal or sublimation design (optional)
- Paper towels & gloves
Quick tip (optional):
Double wall tumbler specifically for snow globes are much easier than drilling. I’m all about easier.
Step One: Prepare the Tumbler and Work Surface
- Always start on a clean, organized surface area
- Wash and dry snowglobe tumbler thoroughly
- If tumbler is not pre-drilled, drill a small hole near the bottom of the outer wall
- Test-fit your silicone plug
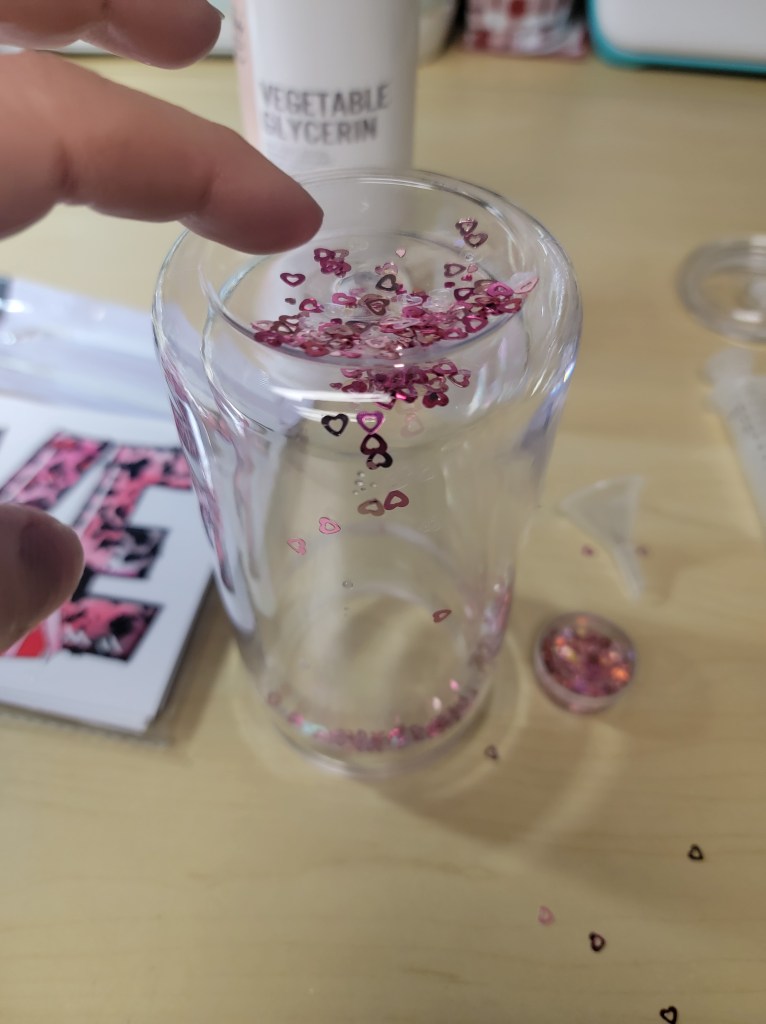
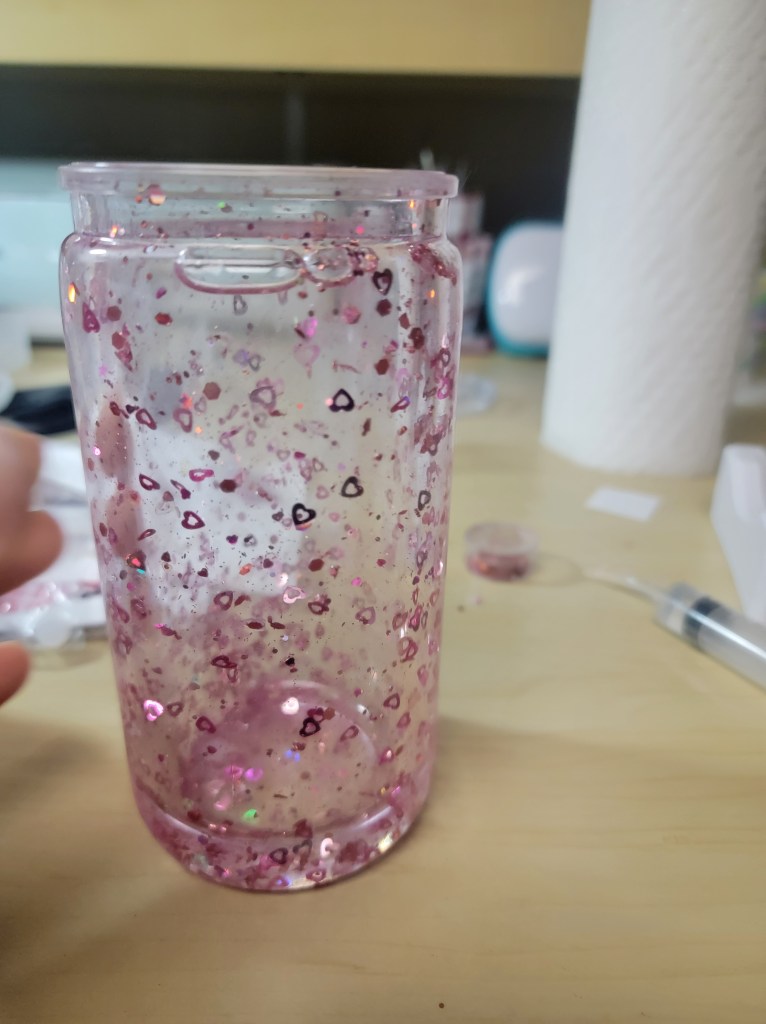
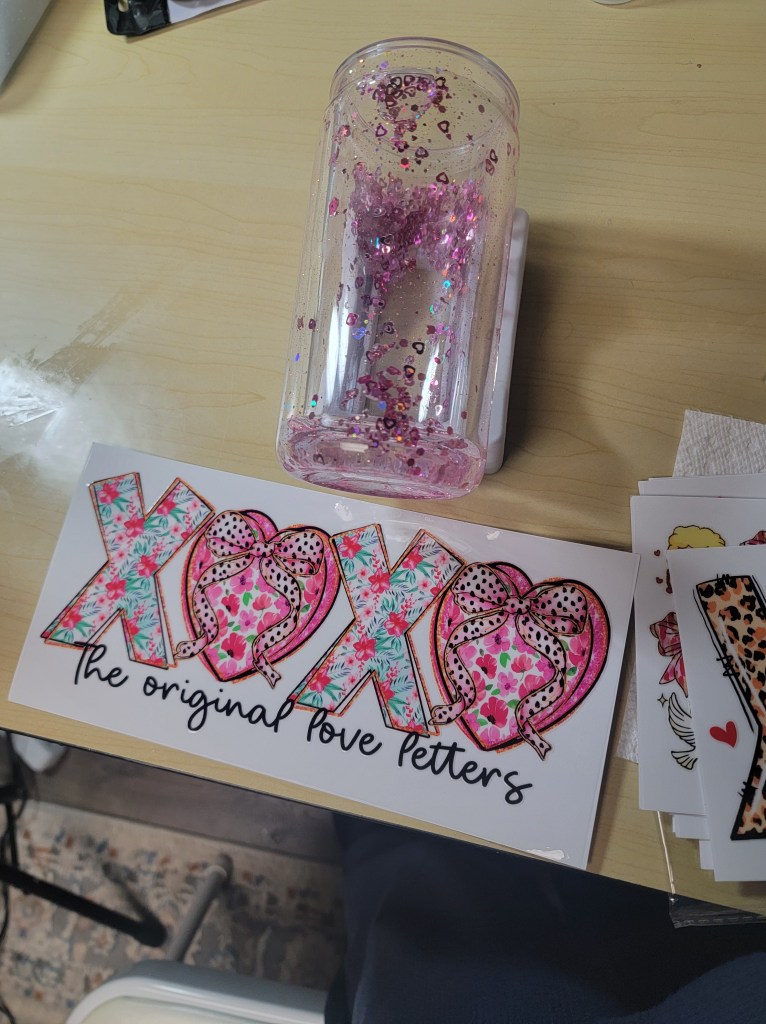
Step Two: Add Glitter and Fill Liquid
Pre-mix up your fill liquid. Mix: 80-90% distilled water with 10-20% vegetable glycerin (more glycerin = slower float)
- Add small amounts of glitter or shapes to the tumbler
- Use a syringe to slowly fill the tumbler
- Leave a tiny air gap for movement.

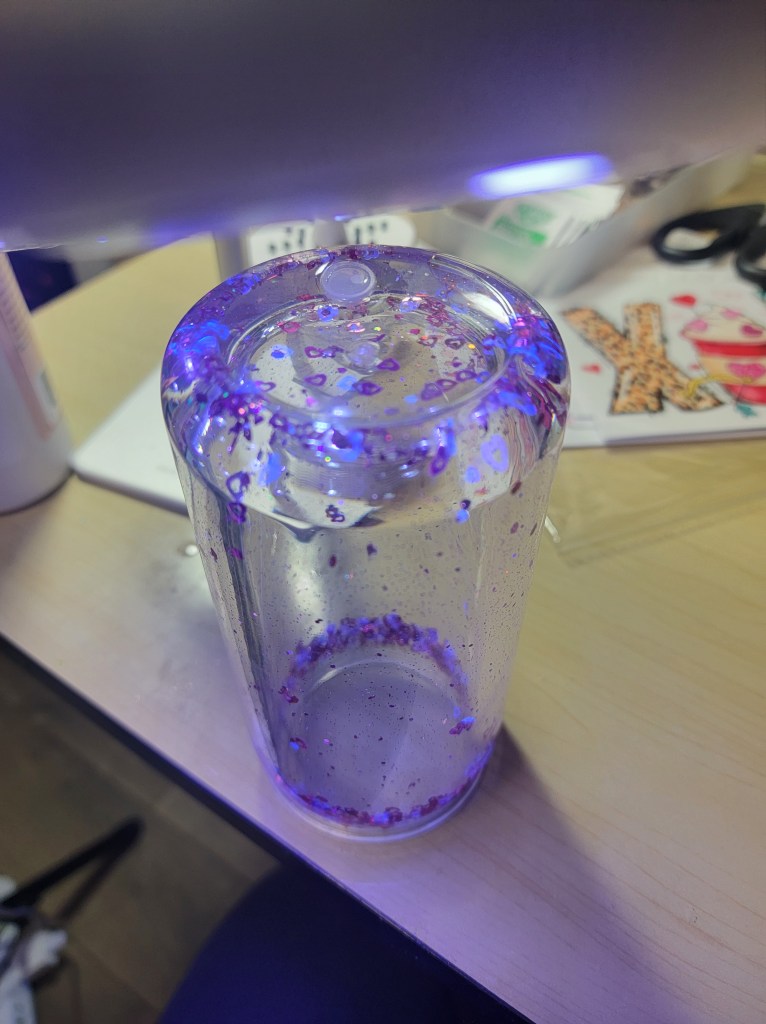
Step Three: Seal the hole
- Insert silicone plug
- Cover with UV resin
- Cure fully with UV light (rotate slightly to avoid sagging)
- Wipe clean once cured. I use alcohol wipes to clean down the whole tumbler.
⚠️ Important: Let resin completely cure 24–72 hours before use.
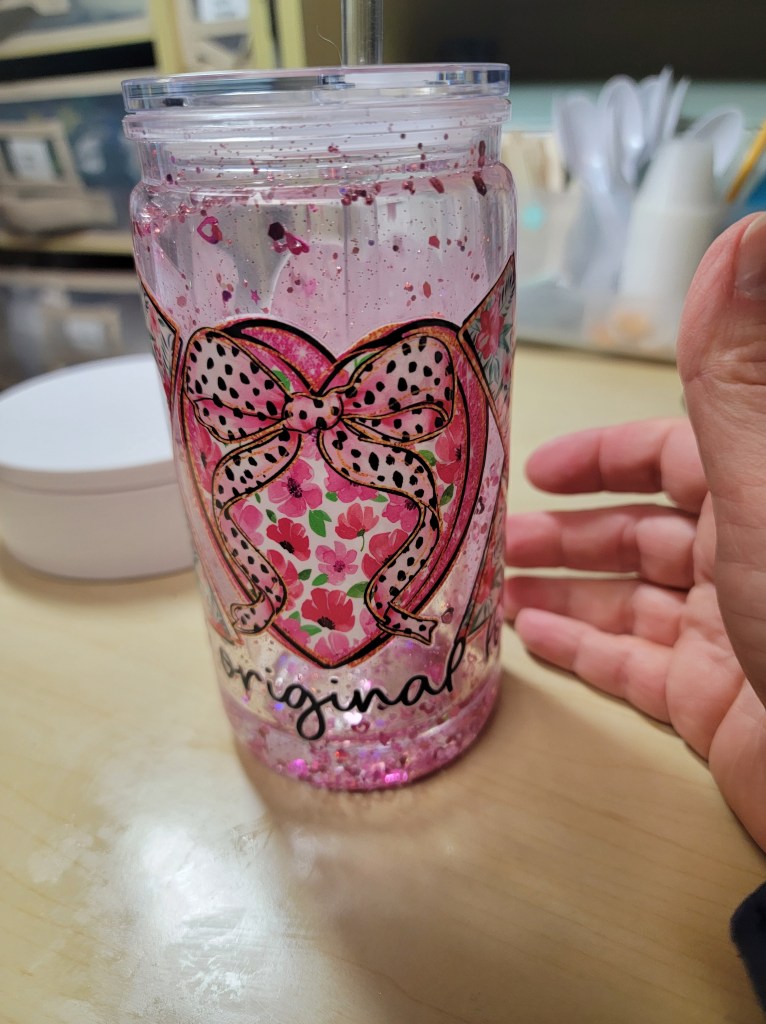
Step Four: Decorate the Tumbler
- Add vinyl decals after sealing. I used UV DTF stickers on this pictured project.
- Or create a matching keychain to hang around the straw.
Other Thoughts
The amount of glitter is entirely up to you. Chunky glitter and fine glitter behave differently. Experiment to find what you like best. Try tiny beads and small resin sprinkles for fun. Add color to the liquid fill. Be creative!
- Make sure you always use distilled water!
- I’d love to see your snowglobe tumbler result. Please share how they turn out.
Why I Love This Project
People love receiving this project as a gift and it’s a joy to see how well they are received. I really love using one at work as it is always a chance to show off the results of my efforts.
- The supplies are always readily available – glitter is easy to find!
- There are so many creative UV DTF stickers, shopping for them is almost as fun as using them!
🛒 Shop the Supplies Used in This Project
(Walmart Creator links below) I’ve linked the exact items I use below — everything ships from Walmart!
- Double-wall clear tumbler (pre-drilled-16–24 oz works best)
- Glitter, mica powder, sequins, or shapes
- Distilled water
- Vegetable glycerin or clear glue (for slow-float effect)
- UV resin (quick-cure, crystal clear – for sealing)
- UV light (if using UV resin)
- Plastic syringe or pipette
- Vinyl decal or sublimation design (optional)
- Paper towels & finger cot
If you’re starting from scratch, you’ll want all of the above on hand before you begin.
Read Privacy Policy for details


Leave a comment