If you’ve been wanting to try resin but didn’t know where to start — this is it.
This beginner resin votive is:
• Simple mold
• Clean, controlled pour
• Mica + glitter friendly
• Designed specifically for LED use
It’s meant to feel doable — not overwhelming.
👉 Watch the full video tutorial here:
https://www.youtube.com/watch?v=77ZWwKft7mA
⭐ Walmart Creator Disclosure
This post may contain affiliate links. As a member of the Walmart Creator Program, I may earn a small commission if you purchase through my links — at no additional cost to you. I only recommend products I personally use in my studio.
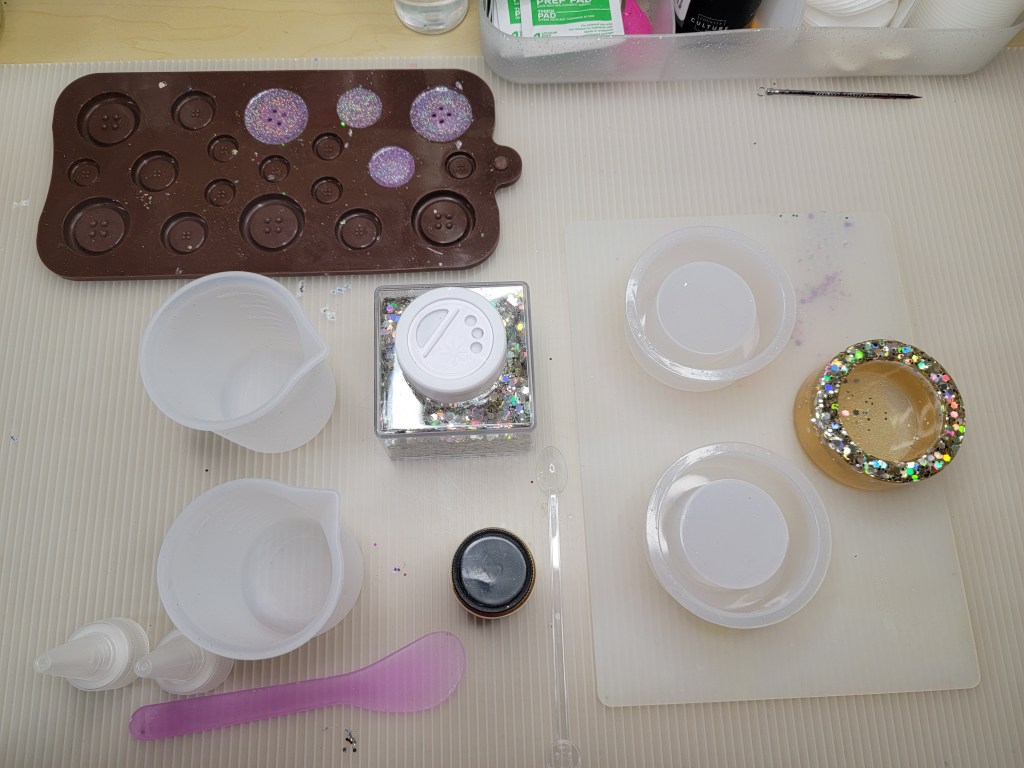
Supplies You’ll Need
- Beginner Epoxy Resin (1:1 ratio)
- Silicone Votive mold
- Mica Powder
- Glitter
- Mixing cups
- Stir Sticks
- Gloves
- Isopropyl Alcohol
- LED Votive Candles
Optional:
• Small silicone molds for leftover resin (I’ll explain why at the end)
Video Timestamps (If You Prefer to Follow Along)
0:00 – Finished glow reveal
0:13 – Supplies overview
0:20 – Mixing resin (1:1 ratio)
0:52– Adding mica + glitter
1:35 – Pouring into mold
2:49 – Cure time + demolding
3:19 – LED glow test
Step-by-Step Instructions
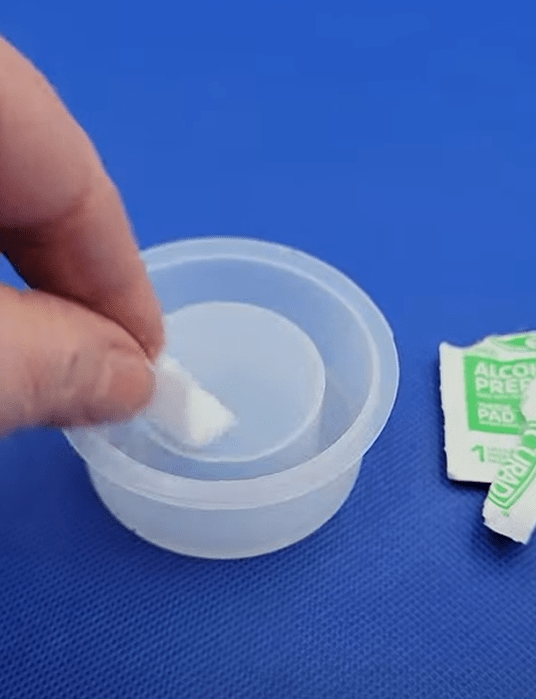
Step 1: Prep Your Mold
Lightly spritz your silicone mold with isopropyl alcohol.
This helps reduce bubbles and makes demolding easier later.
Set your mold on a level surface before pouring.
Step 2: Measure Your Resin (Equal Parts!)
This tutorial uses a 1:1 epoxy resin.
Measure equal parts of Part A and Part B carefully.
Accuracy matters more than speed here.
Beginner tip:
Scrape the sides and bottom of your cup while mixing.
Mix slowly to reduce bubble formation.
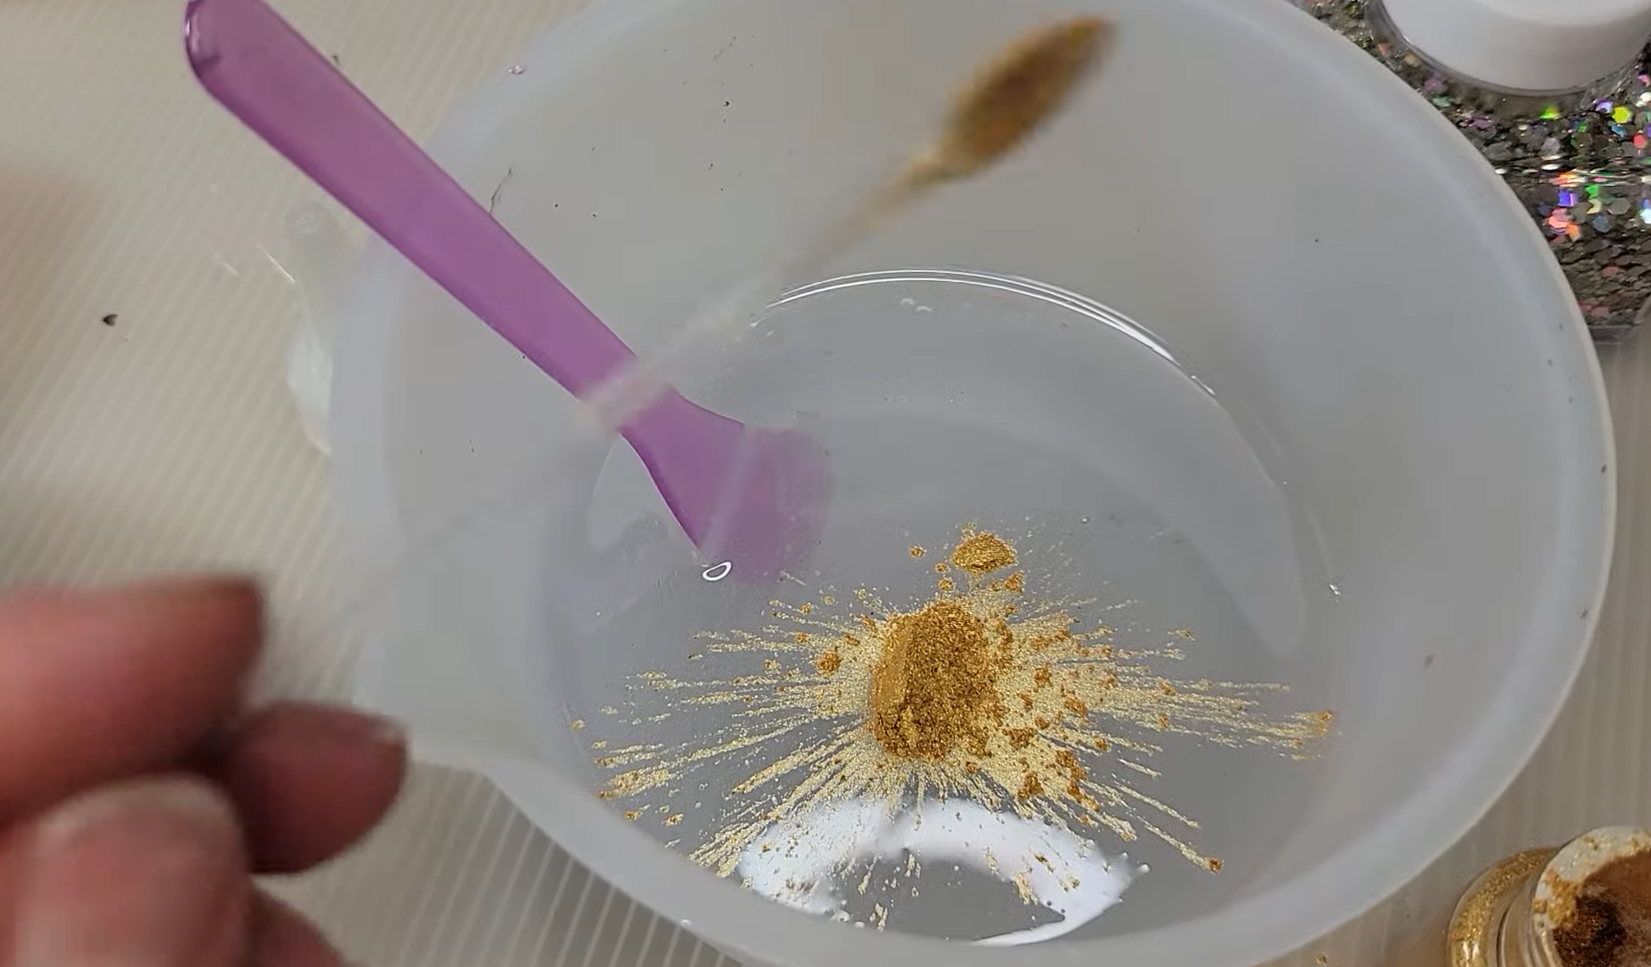
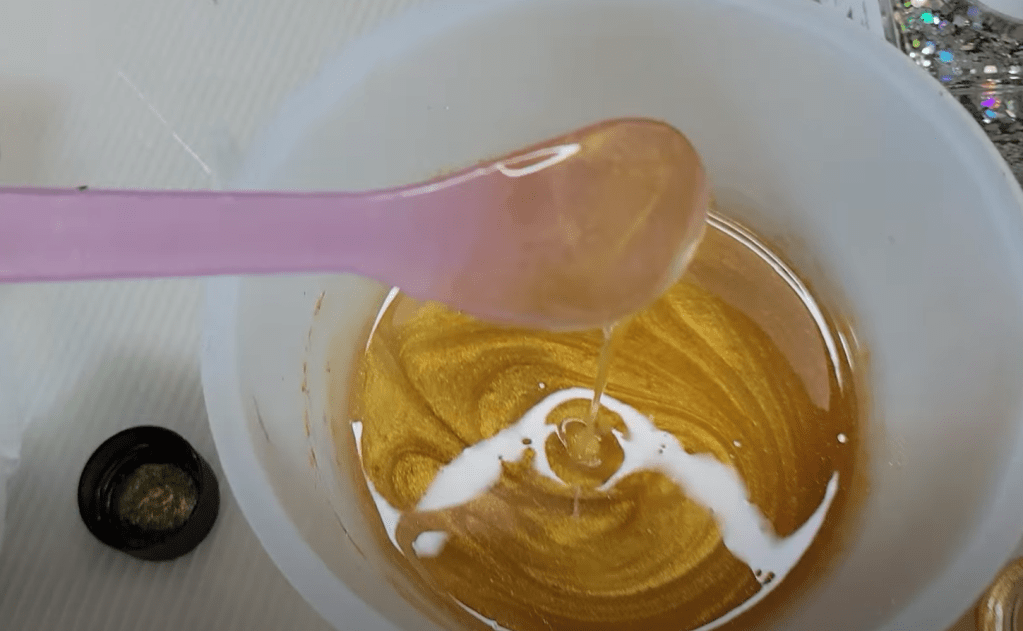
Step 3: Add Color + Sparkle
Once fully mixed:
• Add a small amount of mica powder
• Stir until evenly blended
• Add glitter if desired
Remember — you can always add more.
You can’t remove it once it’s in.
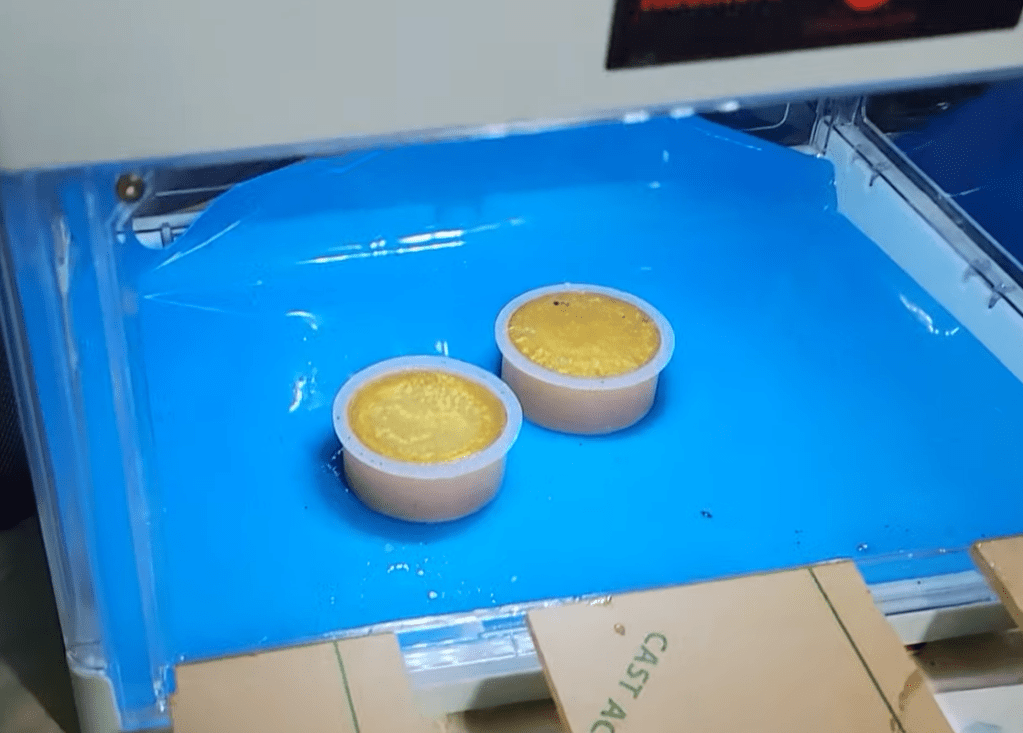
Step 4: Pour Slowly
Pour into the center of your mold and let the resin self-level.
Slow pouring helps:
• Reduce trapped air
• Keep edges clean
• Prevent overflow
If bubbles appear, lightly spritz alcohol across the surface.
Step 5: Let It Cure
Follow your resin’s cure time instructions.
Do not rush this part.
Touching too soon can leave fingerprints or dent edges.
I let this one cure for 24 hours.
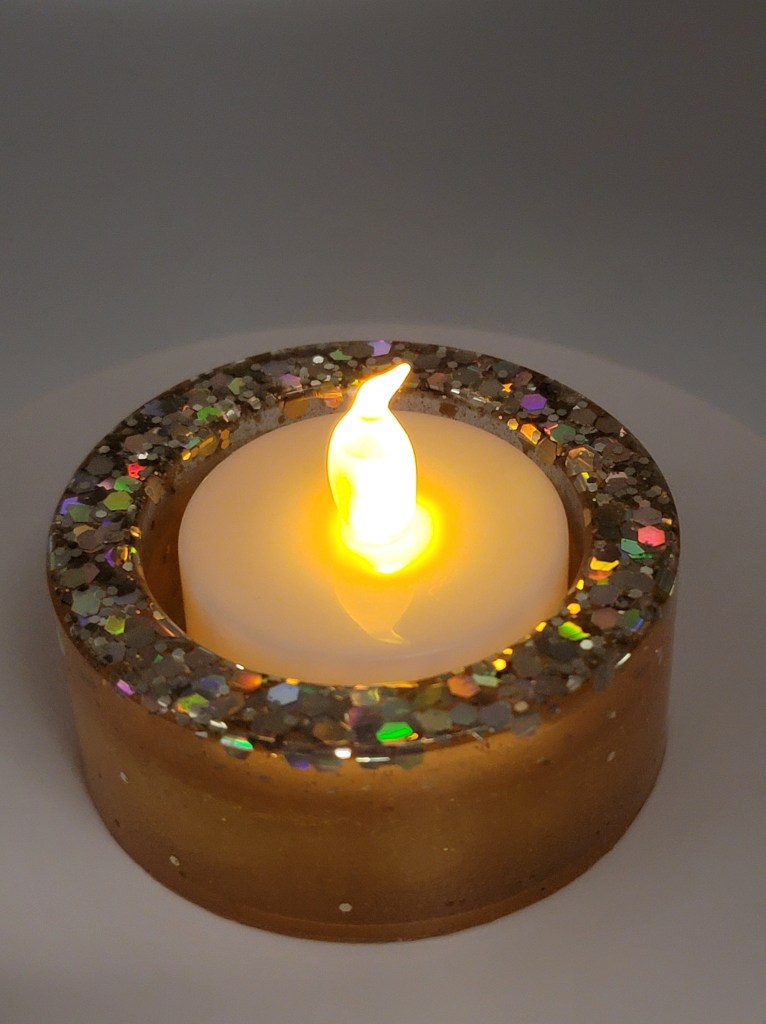
Step 6: Demold + Glow
Once fully cured:
Gently peel the silicone mold away.
Insert an LED votive only.
⚠️ Important:
This project is designed for LED candles — not real flame. Resin is not heat safe for open flame use.
The glow through mica and glitter creates that cozy sparkle effect you saw in the intro.
Common Beginner Mistakes (and How to Avoid Them)
❌ Incorrect Resin Ratio
Always measure carefully. Uneven ratios cause sticky cures.
❌ Over-Mixing Glitter
Too much glitter can make resin cloudy. Start small.
❌ Rushing Demolding
If it feels flexible or tacky, it needs more time.
❌ Using Real Candles
Resin + flame = not safe. Stick to LED.
Bonus Beginner Habit: Keep Small Molds Nearby
One of my favorite beginner tips:
Keep small silicone molds near your workstation.
When you have leftover resin from a project:
Pour it into a small mold instead of wasting it.
This builds:
• Confidence
• Practice reps
• Bonus projects
Buttons, bookmarks, mini shapes — they add up fast.
It’s a creative win instead of waste.
Why This Is a Great First Resin Project
• Small surface area
• Easy to control
• Fast visual payoff
• Teaches measuring + mixing fundamentals
• Builds confidence without overwhelm
And once you pour one… it’s hard to stop.
Want More Beginner Resin Projects?
I share:
• Beginner-friendly tutorials
• Leftover resin experiments
• Live resin pours
• Micro-lessons on Facebook
If you ever find value in my live sessions, Facebook Stars are enabled and always appreciated — but never expected. Your engagement and comments mean just as much.
YouTube: https://www.youtube.com/@AnnettesCreativeCorner
Facebook: https://www.facebook.com/AnnettesCreativeCorner
If you make this votive, I’d love to see it.
Tag me or send a photo — I love seeing your first resin wins.
Read Privacy Policy for details


Leave a comment