Sublimating a mug using infusible ink is one of the easiest ways to create a professional-looking, long-lasting design at home. If you’re just getting started with sublimation or Cricut infusible ink, this project is a great place to begin.
In this tutorial, I’ll walk you through exactly how I make a sublimation mug—from setup to the final reveal.
Watch the video
Sometimes seeing the steps helps. Watch here: https://www.youtube.com/watch?v=l6HJBDMF47A
📢 Affiliate Disclosure
This post may contain affiliate links through the Walmart Creator program. If you purchase through these links, I may earn a small commission at no extra cost to you.
I only share products I personally use or recommend.💛
🧰 Supplies You’ll Need
- Sublimation-ready mug (poly-coated)
- Infusible ink sheet
- Cricut machine (or cutting machine)
- Heat press or mug press
- Butcher paper
- Heat-resistant tape
- Lint roller
✂️ Step 1: Cut Your Design
Choose your design and cut it using your Cricut machine and infusible ink sheet.
👉 Make sure to mirror your design before cutting.
🧼 Step 2: Prep the Mug
Clean the mug thoroughly using a lint roller to remove any dust or debris.
This step is important—any particles left behind can affect your final result.
📍 Step 3: Position and Secure
Place your design on the mug and secure it with heat-resistant tape.
Make sure:
- the design is flat
- there are no gaps or lifting edges
🔥 Step 4: Apply Heat
Use a mug press or heat press according to your machine’s settings.
- Follow recommended temperature and time
- Wrap with butcher paper to protect your press
Avoid moving the design during pressing.
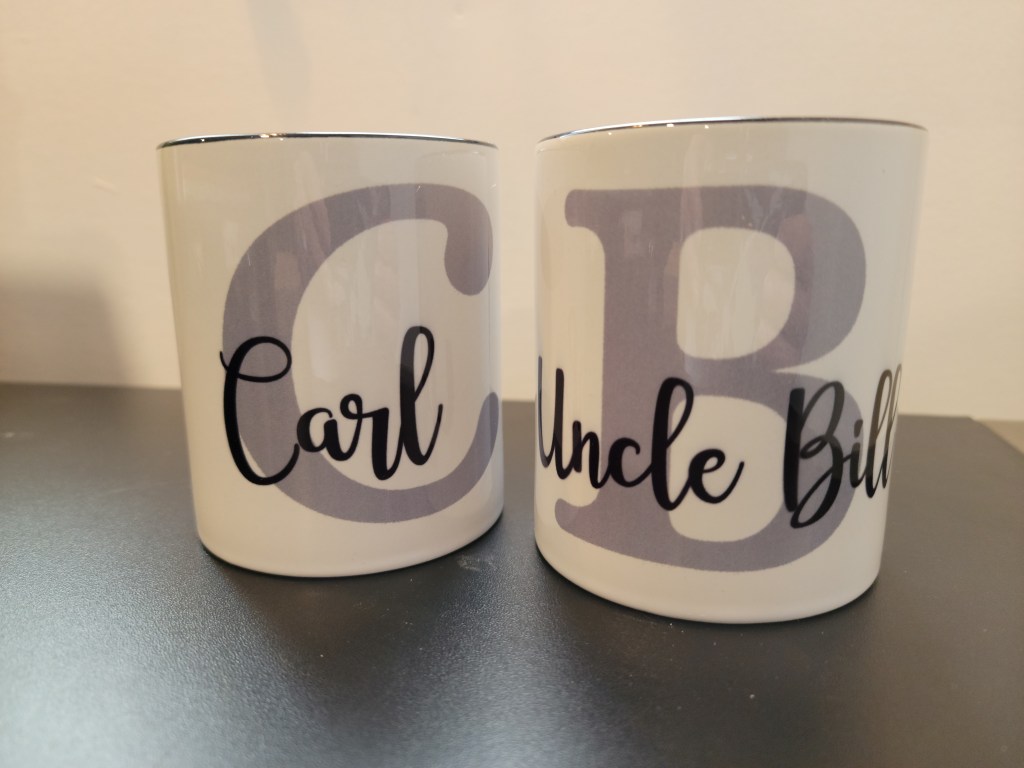
✨ Step 5: Reveal
Once the time is up, carefully remove the mug and let it cool slightly.
Peel back the design to reveal your finished sublimation mug.
This is always the most satisfying part!
💡 Tips for Best Results
- Use only sublimation-compatible mugs
- Always mirror your design
- Apply even pressure
- Don’t skip the lint roller step
💛 Why I Love This Project
Sublimation with infusible ink is a simple way to create custom, high-quality mugs that won’t peel or fade.
This is one of my favorite beginner-friendly projects, and it’s easy to customize for gifts, events, or just for fun.
🛒 Supplies I Used + Where to Find Them
Here are the exact supplies I used for this sublimation mug project. I’ve linked similar items so you can easily find what you need.
Sublimation Mug (Poly-Coated)
A mug specifically designed for sublimation is key for long-lasting results.
Find here: https://walmrt.us/3OOaNjh
Infusible Ink Sheets
These transfer vibrant, permanent designs when heat is applied.
Find here: https://walmrt.us/4cipNyT
Cricut Cutting Machine
Used to cut the design from the infusible ink sheet.
Find here: https://walmrt.us/3Of9ppL
Mug Press or Heat Press
Applies consistent heat and pressure for the sublimation process.
Find here: https://walmrt.us/4dW9p8q
Heat-Resistant Tape
Keeps your design securely in place during pressing.
Find here: https://walmrt.us/4tdfXEq
Parchment Paper
Protects your press and helps prevent ink transfer where you don’t want it.
Find here: https://walmrt.us/4rsot0I
These links may be affiliate links, which means I may earn a small commission at no extra cost to you. I only share products I actually use or truly recommend.


Leave a comment